Trello for branding projects
Manage Big Projects and Automate your Workflow
Have you ever had a client ask a million questions even though you sent them a clear proposal at the beginning of a project?
Although our clients are invested in the project, they often have a full schedule and might need a helping hand remembering when to send you files or where to access the concepts you created. As designers, it is our job to create a great experience for our clients. That is what will keep them coming back for more work and sending referrals your way.
We also want to save ourselves time by creating a hub where all your client’s questions can be answered.
This is where Trello comes in.
Why Trello?
I have used Trello for the last 5 years of my branding business. I like Trello because:
It has a simple, one page interface that clients find easy to use
You can invite clients with a link - this makes it easy to send an email onboarding them to the setup
It is free
You can create a template and use it over and over
How does it work?
Our goal is to create a home for all the files, discussions and important information for a branding project.
This will be a board where you invite your client and they can see all the stages of the branding project and any important information for each stage. Having all this information in one place rather than scattered among email, cloud services and attachments will mean a lot less risk of confusion and a faster turnaround for you.
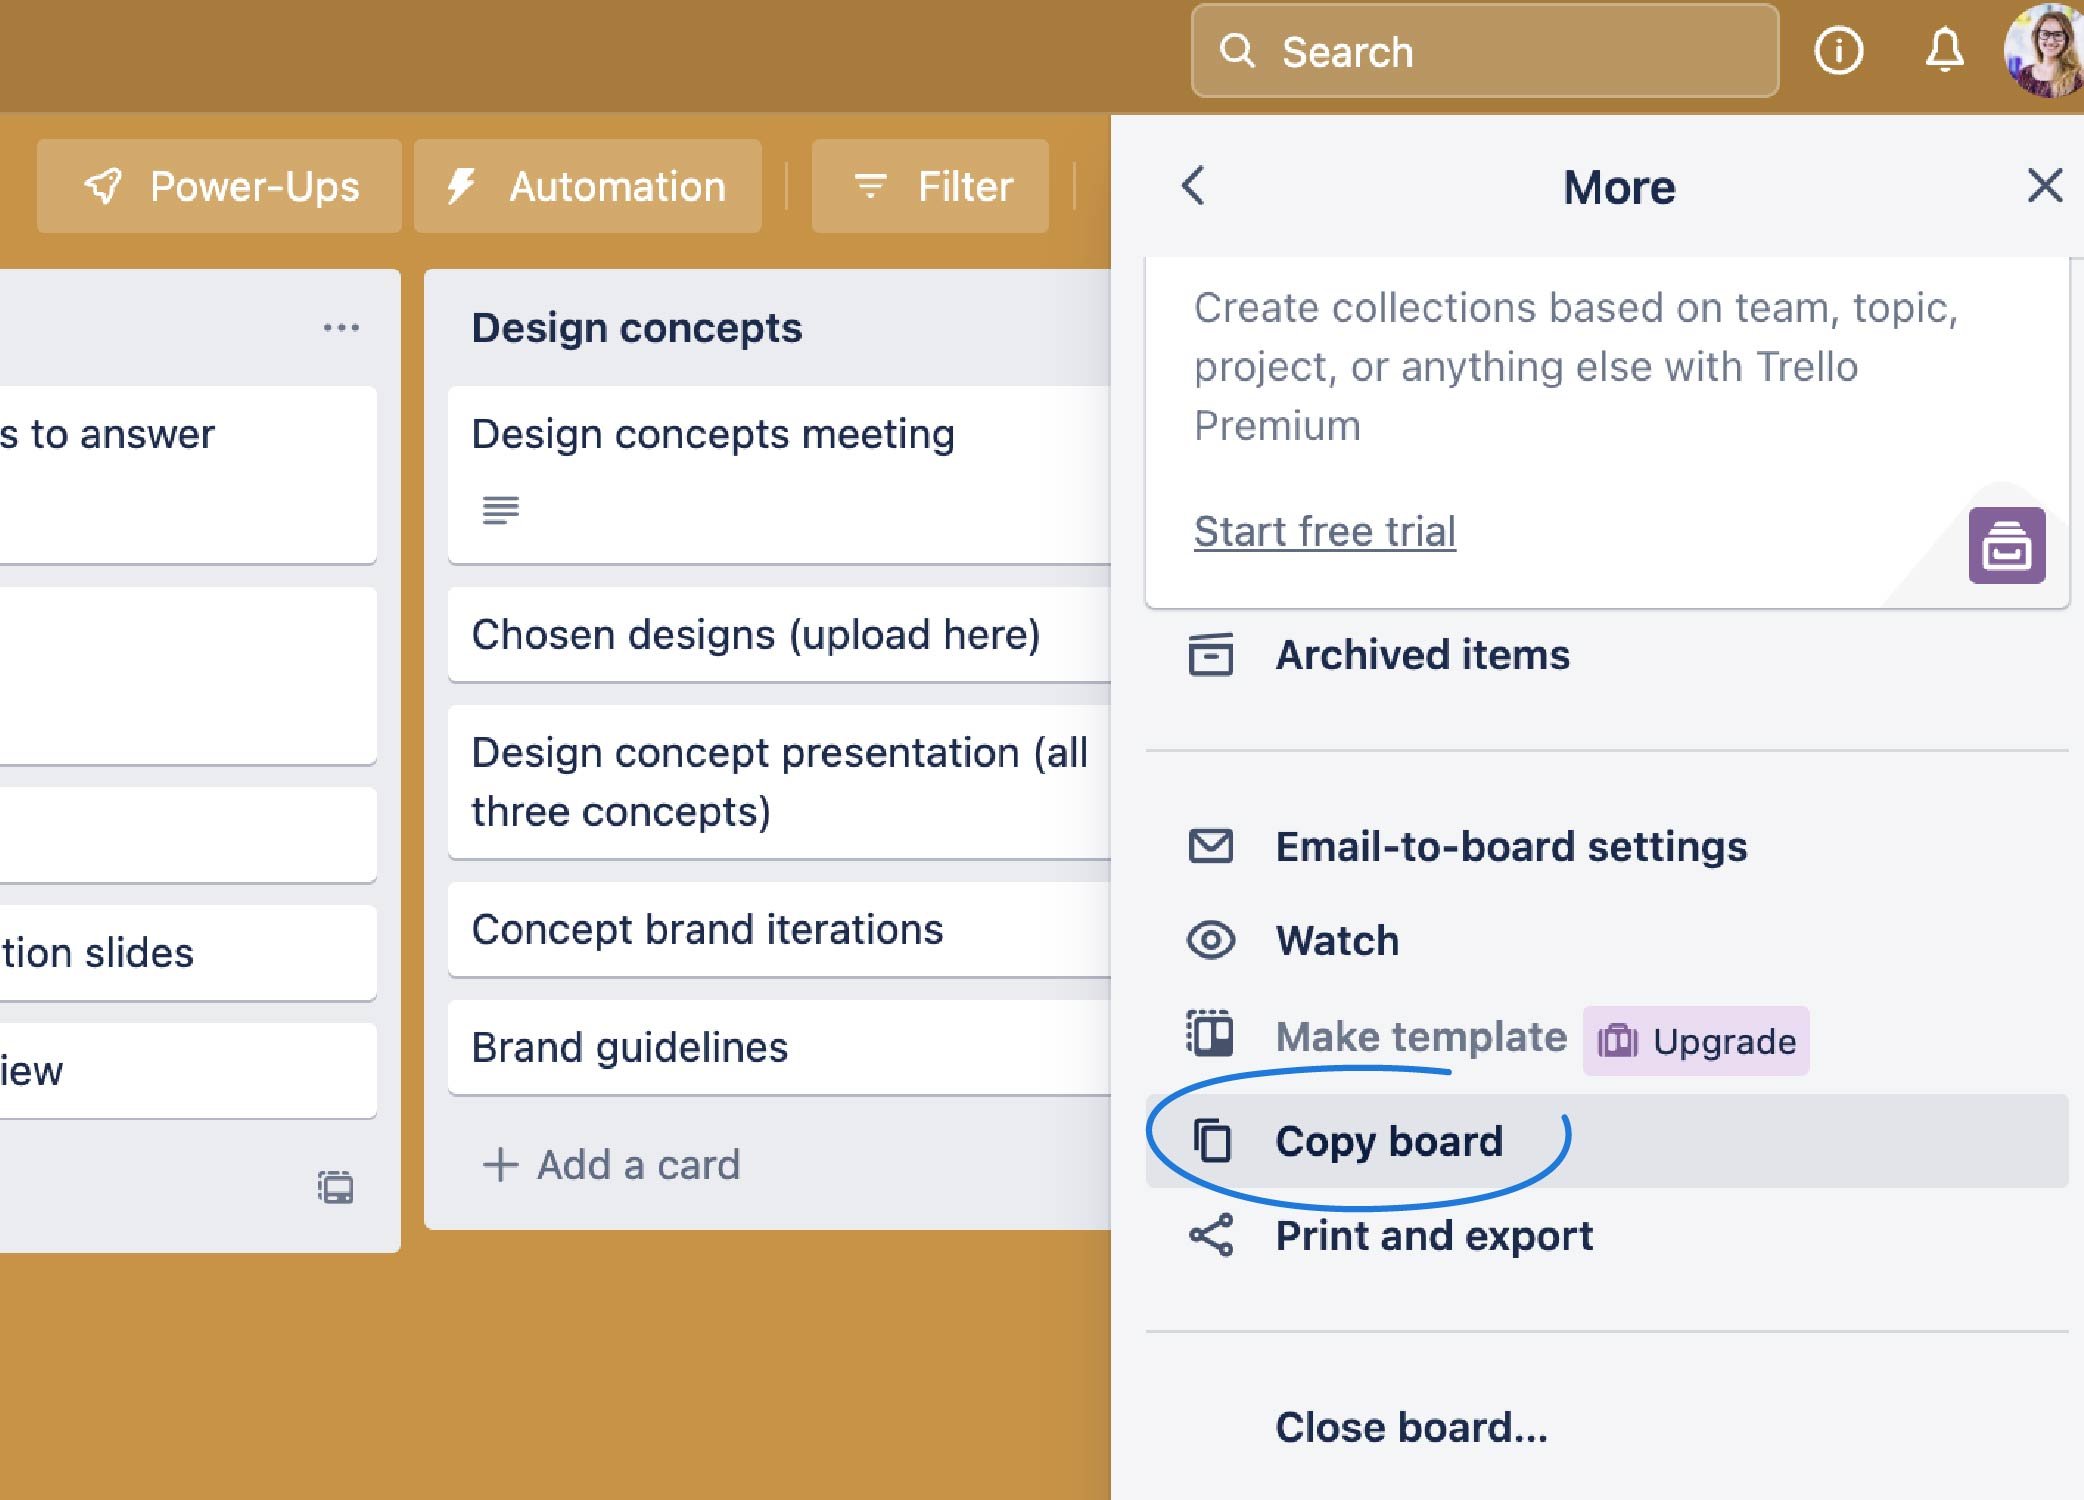
I always suggest creating a template board. This board doesn’t have any project specific information like meeting links or company names but has all the key stages and cards (will we have a look at what to include in a moment).
This way, you can just copy the board when you have a new branding project and add the custom information. Much faster and it helps you refine your creative process.
What to include in your board
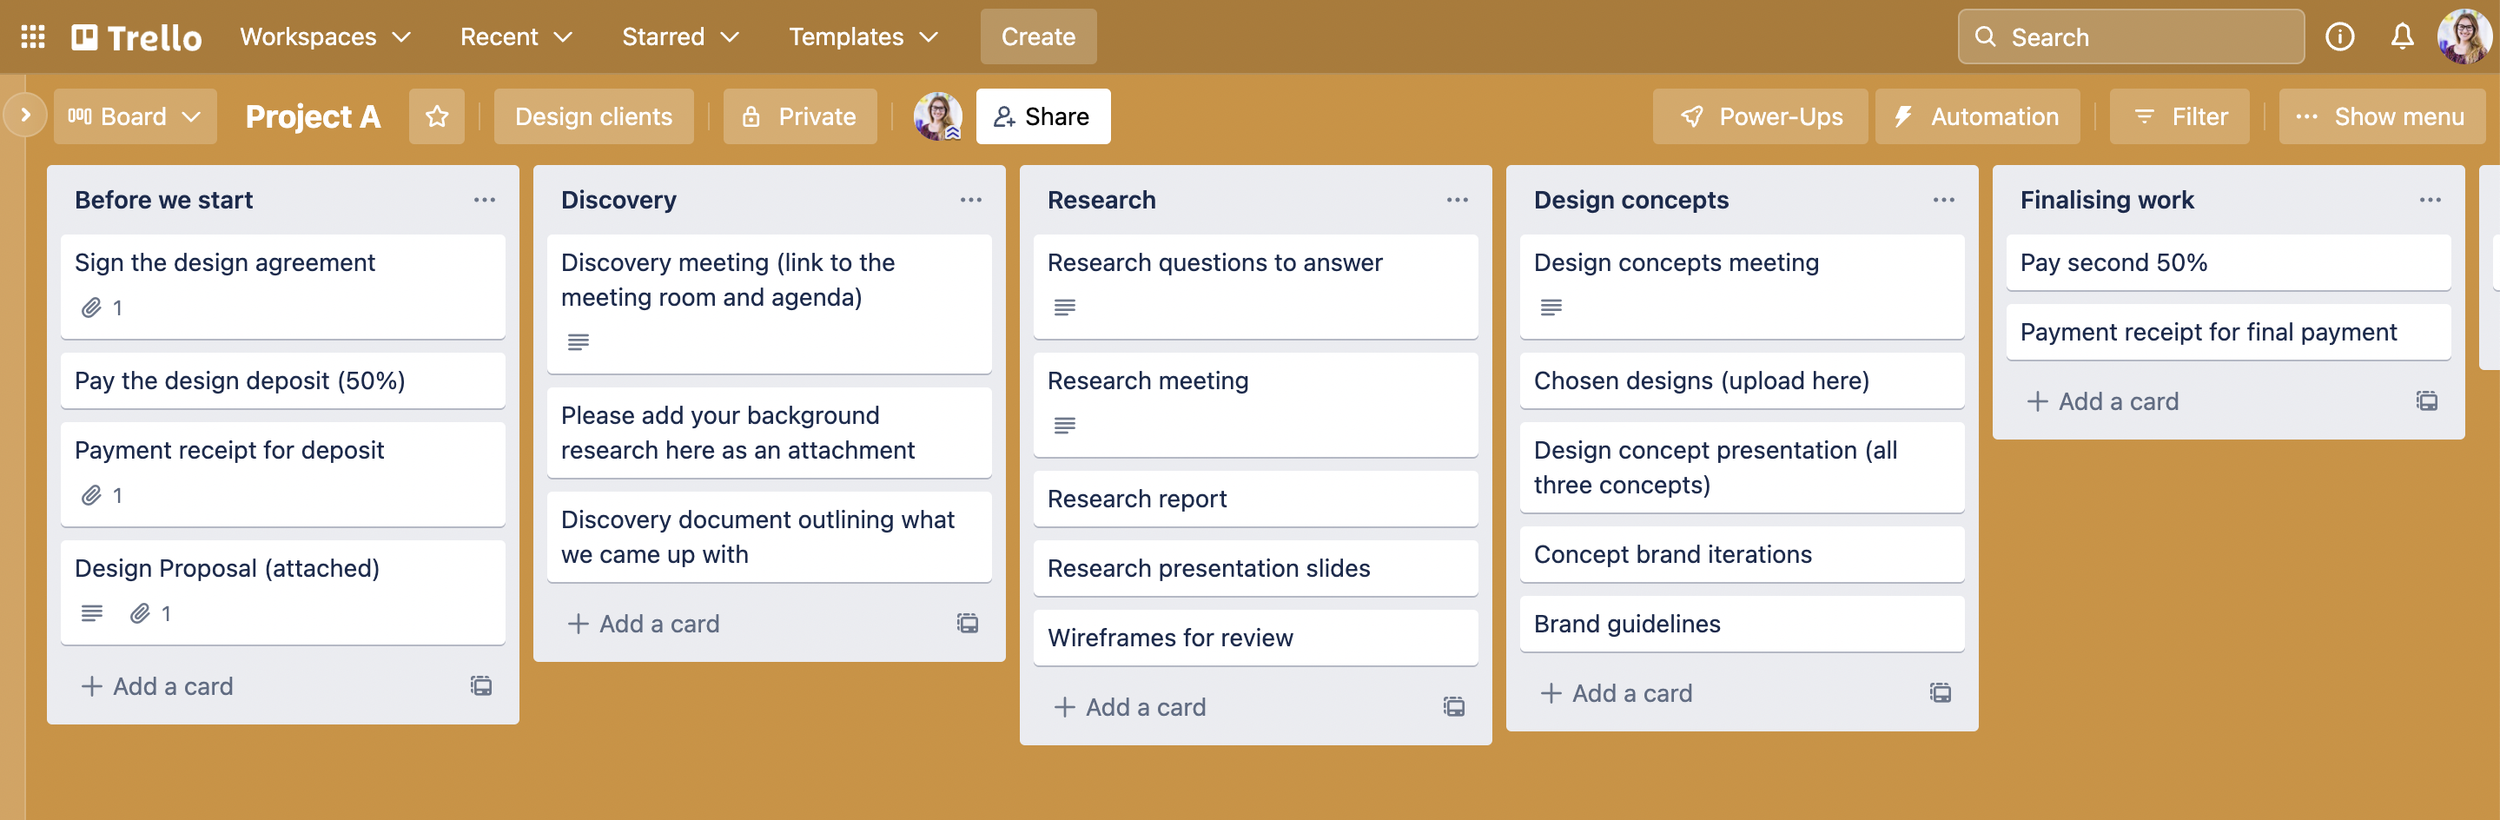
The best way to decide what to include in your board is to look at what stages you have in your creative process. I like to set up one column for each of my stages:
Before we start
Discovery
Research
Design concepts
Finalising work
Handoff
Support
Customising each section
In each column, I then add cards for the different tasks we need to complete, files we will share or other information that will be important for my client to know. For example, in the column “Before we start” I add a card where I attach the proposal so they can always refer back to it. It also has a card for the invoice they need to pay and a card for the signed design contract in case they need to refer to it.
The exact cards you decide to include is up to your preferences. If you know that clients often ask specific questions, like “what is the next step” or “what do you need from me at this stage”, make sure to include cards with the answers to these. This will save you a lot of time and your client will feel cared for.
In case you want to copy my setup and use it as a starting point, here is what I include for each section:
Before we start
Sign the design agreement
Pay the project deposit (50%)
Payment receipt for deposit
Design Proposal
Discovery
Link to the meeting room/directions to a physical location
A place for clients to add their own research or background information
Discovery document (I attach our HolaBrief summary here here after our meeting)
Research
Research questions we want to answer
Research meeting room link/directions to physical location
Attached research report
Research presentation slides
Design concepts
Link to meeting room/directions to physical location
Uploaded design files from the chosen concept
Concept presentation (overview of all concepts)
Iterations
Brand guidelines
Finalising work
Invoice to pay the remaining 50% of the project fee
Receipt when they have paid
Handoff
Link to Google drive or Dropbox with all the final brand files
Support
I like to add a document saying thank you, letting them know how they can leave a review and give them an overview of other services I can offer that they might find interesting.
Inviting clients to a board
When you have set up your template, copied it and filled in all the custom information for a project, it is time to invite your client to the board.
Just click the button in the top menu called “Share”. A window will pop up and you can either add the email of your client or copy the link and send them an email with the link. I like to send an email since this helps me add some more information about Trello and how we will be using the board together. It helps things run a little more smoothly and it can feel more personal.
I hope you found this helpful! If you would like to learn more about how to manage your design projects and business, have a look at this video on Notion.
