
How to on-board your clients and team
On-boarding is the act of letting your client and team know what to expect from a project. It can help you stay organised, avoid delays and is an opportunity to make sure everyone is excited about what is to come.
Why should you on-board rather than just send updates as you go?
The first reason is trust. When everyone knows exactly what to expect, it shows that you plan ahead and no one will be surprised by sudden tasks or deadlines. The second reason is to spot risks or factors you were not aware of. For example, if you have planned to meet in person throughout the project but your client will be travelling, talking about this early on means you can plan together.
On-boarding typically happens at the beginning of a project. Today we will look at how to best set this up and how to add mini on-boarding to each stage of the creative process. This way you don't have to overwhelm anyone but can instead start with an overall plan and then give more details as people need them.

OVERVIEW:
What should your client on-boarding include?
How to package your client on-boarding
On-boarding your team
Dealing with changes to the scope or timeline
As-you-go mini on-boarding
What should your client on-boarding include?
The goal of successful on-boarding is to answer any questions that your client might have or is likely to have throughout the creative process. It will also help avoid scope creep and make sure communications work great.
There are a few sections I suggest to include:
The project timeline
This is a great way to make sure your client knows when they need to be available, how long they have for feedback and when you are looking for their input. If you have periods when you will be away working on a deliverable, your client can see this in the timeline and will feel safe that the project is on track.
Invitation to your project management system
If you are using Trello, Asana, Kayla or any other tools to communicate with your clients and collect files, this is a great time to introduce these and explain how they work.
If you feel your client needs a short walkthrough to understand the tool, take the opportunity to look at this in your first meeting or record a quick video and add it to the on-boarding document.
A summary of what you need from your client
Help your client plan and keep the project on track by providing clear instructions on what you need from them - like images for their website - and when you expect this by.
Best ways to contact you
Make it easy for your client to ask a question by letting them know how to best get in touch. This might be email, through your project management tool or over the phone depending on your preferences and how digitally savvy your client is.
How to package your client on-boarding
I love templates, they make life so easy! Make sure you have all the sections you need and add your own branding to make it look cohesive. You can then just customise the relevant sections for each project and click send.
There are many different formats you can use. A straight forward option is to use an editable PDF or a Google doc. If you want to use a more flexible format, try using an Adobe XD or Notion link. In this option, you create a page using either of the tools and then create a sharable link. This link can be added to a welcome email and when your client clicks it, they get to your on-boarding page. Below is an example created in Adobe XD.

If you decide to use this strategy, it can be hard to update information if something changes in the project along the way. It is also possible that your client accidentally deletes the email with the link or can't find it later.
To avoid this, I suggest using a project management tool like Trello to use as your project home base and include your on-boarding here. This means your client and team have access to all the information and links to other tools they might need along the way. You can also upload presentation slides or summaries after a meeting so everyone can remember what you have agreed upon.
Here is an example of what the home base can look like in Trello for the first few stages of the design process:

To give your client access, all you have to do is send them a link to the board or send them an invite.
Another way to save time and automate your on-boarding is to use Kayla to collect all the files you need from clients and your team. You can set up requests with individual due-dates for everything you need at the beginning of a project and click send. You and each person contributing something will then have your individual dashboard with what to send and when.
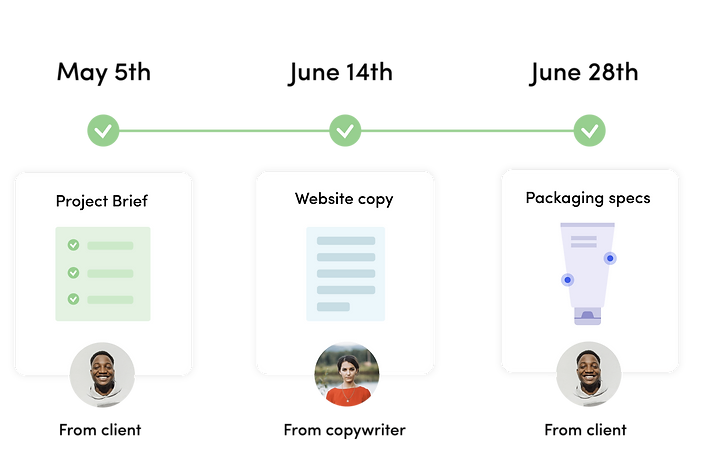
Kayla also sends automatic reminders if someone forgets to send you something so the whole process becomes automated - saving you a ton of time and stress.
You can accept any file format and add instructions to help your client send exactly what you need.
On-boarding your team
If you are leading an in-house team or if you collaborate with other creatives it is a great idea to on-board your team mates as well. What role will each person play? When do you expect what deliverables and at what stages do you want to see drafts or give feedback. Knowing this, everyone will feel more confident in their work and you avoid confusion that can affect your timeline or profit margin.
Perhaps you have an internal project management system or a chat system like Slack. Now is a great time to create a new room for the project and invite everyone. Make sure the brief is clear and that everyone know their roles.
Dealing with changes to the scope or timeline
Sometimes things change. Perhaps your client needs more work done or maybe there was a delay in getting the right feedback. This is why I suggest your on-boarding document and proposal act as living documents. If you use a tool like Trello, you can just remove the old version of the on-boarding doc, upload a revised one and let your client know of the change. This way, the document always shows the latest version with up to date information.
As-you-go mini on-boarding
If you have longer, more complex projects - mini-on-boarding can be a great solution. Instead of showering your client with a ton of information before you start, you can let them know of the overall information and explain the details when you get there.
This is especially helpful if you use tools. For example, you might collect feedback from Invision. Instead of trying to explain how this works in the beginning, you upload the design once it is ready for review, invite them and have a quick call to explain how they can leave their comments. Not only will this make more sense now that they can see the application, it is also fresh in their memory when they need it.